Introduction
It is 11 PM and you are already in bed. You grab your phone to check your Vivint app — and your garage door sensor shows offline. No alerts. No warnings. Just a dead battery that quietly failed days ago.
This happens to homeowners across America more than you think.
Vivint garage door sensor battery replacement is one of the simplest tasks you will ever do — yet most people never think about it until something goes wrong. A small battery powers your entire garage security. When it dies, your Vivint system goes blind — and your home is exposed without a single notification.
This guide covers everything you need — the right battery, the exact replacement steps, how often to do it, and what to check if the problem runs deeper.
Let’s fix this before it becomes a real problem.
Table of Contents
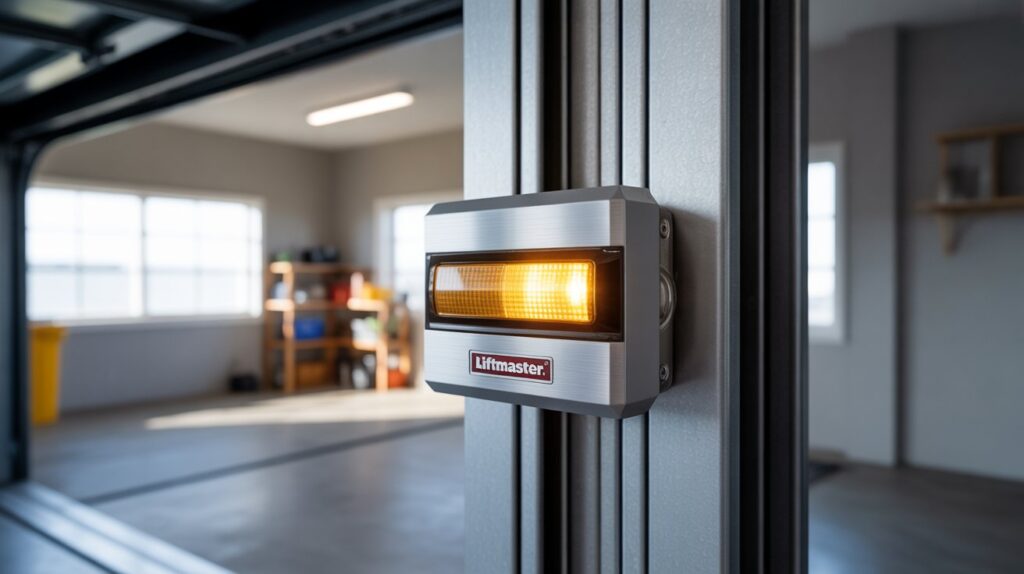
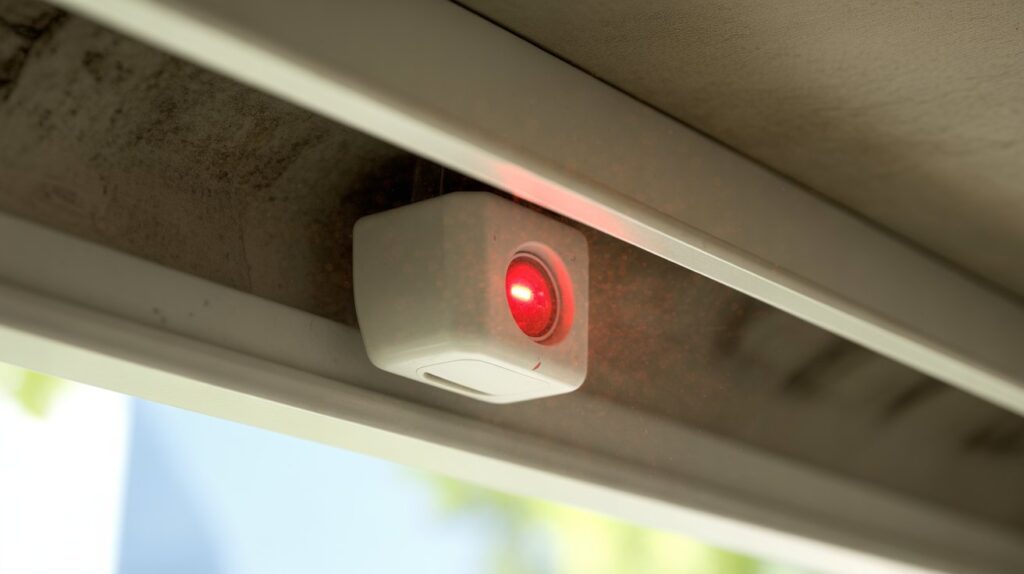
How the Vivint Garage Door Sensor Actually Works
Most people install a Vivint garage door sensor, forget about it, and assume everything is running fine. And that is the moment your home security quietly begins to fail.
The Vivint garage door sensor is a small but powerful part of your home security system. It sits on your garage door frame and uses a magnetic contact to detect one simple thing — is your door open or closed? The moment that status changes, here is exactly what happens:
- The sensor instantly detects the movement through its magnetic contact switch
- It sends a wireless signal directly to your Vivint Smart Hub
- Your Vivint app sends a real-time notification straight to your phone
- Your security system logs the event automatically
All of this happens in seconds. No delays, no manual checking, no guessing.
But here is the part that most homeowners completely overlook — every single step of that process runs on one small battery inside the sensor.
When that battery weakens, the whole chain breaks down. Here is what poor battery health actually does to your security:
- Delayed alerts — you get notified too late or not at all
- Inconsistent signals — your Vivint panel loses track of your door status
- Complete sensor blackout — your system shows the door as closed even when it is wide open
That last one is the scary part. You could be at work, feeling completely safe, while your garage sits wide open — and your Vivint system stays completely silent.
This is why vivint garage door sensor battery replacement is not just routine maintenance. It is the difference between a smart security system that actually protects you and one that only looks like it does.
What Battery Does the Vivint Garage Door Sensor Use?
Before you run to the store, you need to know exactly what you are looking for. Grabbing the wrong battery is one of the most common mistakes homeowners make — and it costs you an extra trip, extra time, and unnecessary frustration.
The good news? The battery itself is cheap, easy to find, and available almost everywhere in the USA.
Most Vivint garage door sensors use one of these two battery types depending on your model:
- CR2032 — a small, flat coin battery used in newer and compact Vivint sensor models
- CR123A — a slightly larger cylindrical battery found in older or heavy-duty Vivint sensor versions
Not sure which model you have? Check the inside of your sensor casing — the battery type is usually printed right there. You can also check your Vivint app or the original product documentation that came with your system.
Where to Buy the Right Battery
This part is easy. These batteries are widely available across the USA at:
- Amazon — fastest option, often sold in multi-packs at a lower price per battery
- Walmart or Target — great for same-day pickup if you need it right now
- Home Depot or Lowe’s — solid option if you are already making a hardware run
- CVS or Walgreens — perfect for a quick grab when nothing else is convenient
What to Avoid
Not all batteries are created equal, and cutting corners here can cost you more than you think. Here is what to stay away from:
- Generic no-brand batteries — they drain faster and give inconsistent voltage, which can cause false alerts or sensor dropouts
- Expired stock — always check the expiration date on the packaging before buying
- Rechargeable versions of CR2032 or CR123A — these run at a slightly lower voltage and can confuse your Vivint sensor into reporting false low-battery warnings
Stick with trusted brands like Energizer, Duracell, or Panasonic. These are the brands most Vivint technicians recommend because they deliver consistent power and a longer lifespan — which means fewer replacements and more reliable home security.
A good battery costs less than two dollars. A garage left unsecured because of a dead one? That cost is something no one wants to find out.
Step-by-Step — How to Replace the Vivint Garage Door Sensor Battery
Here is the truth — most people overthink this. They assume it is complicated, put it off for weeks, and meanwhile their garage door sensor is slowly going blind. The reality is that vivint garage door sensor battery replacement takes less than five minutes and requires almost nothing special.
Let me walk you through it, step by step.
Tools You Need (Spoiler: Just Your Hands)
No toolbox required. Seriously.
In most cases, all you need is:
- A fresh replacement battery (CR2032 or CR123A depending on your model)
- A small flathead screwdriver — only needed for some older sensor models with a screw tab
- Good lighting — a phone flashlight works perfectly fine
That is it. No ladder, no wiring, no professional help. This is a job any homeowner in America can do in their living room, garage, or driveway without breaking a sweat.
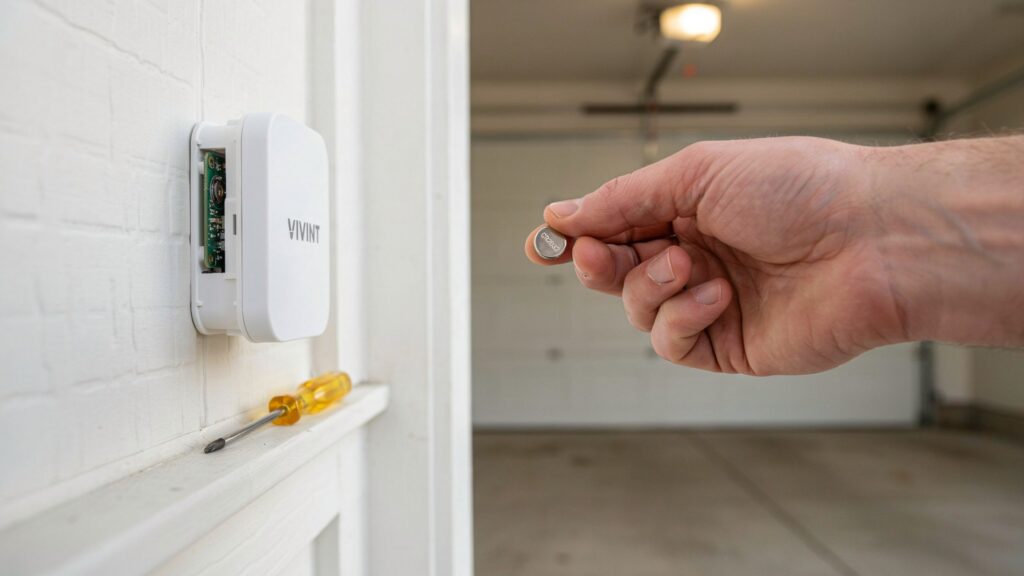
Opening the Sensor Without Breaking It
This is where most people accidentally cause damage — not because it is hard, but because they force it.
Here is how to open your Vivint garage door sensor the right way:
- Look for a small notch or slot on the side or back of the sensor casing — this is your opening point
- Press gently with your thumb or use a flathead screwdriver with light pressure — never force it
- Slide or pop the cover off with a smooth motion — it should come off easily with minimal resistance
- Set the cover aside safely — losing it means an exposed sensor that collects dust and moisture
If your sensor has a screw on the back, remove it first before attempting to open the casing. Some older Vivint models use a single Phillips screw to keep the cover secure.
Take your time here. A cracked casing means you may need a full sensor replacement — and that is a much bigger headache than a simple battery swap.
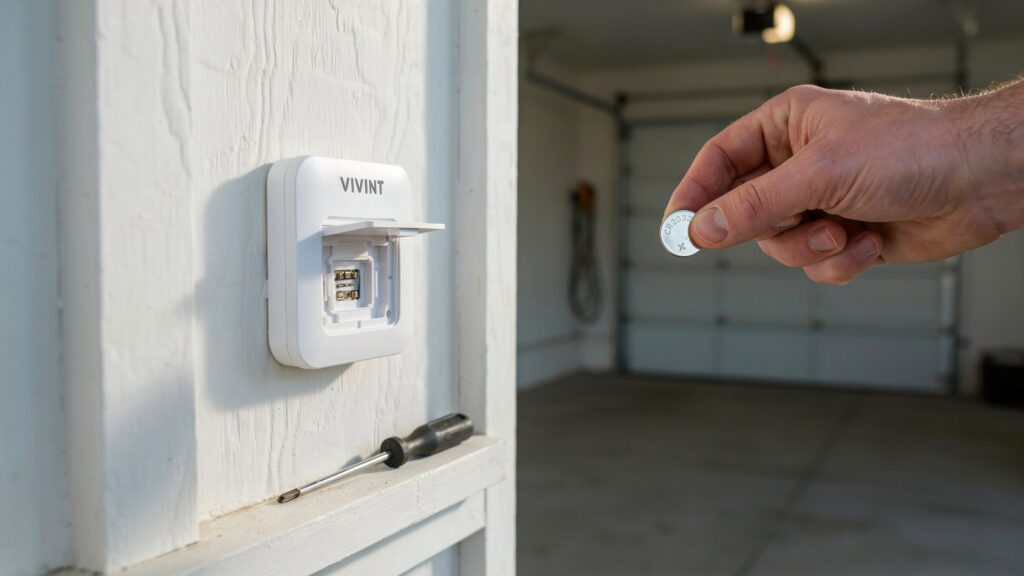
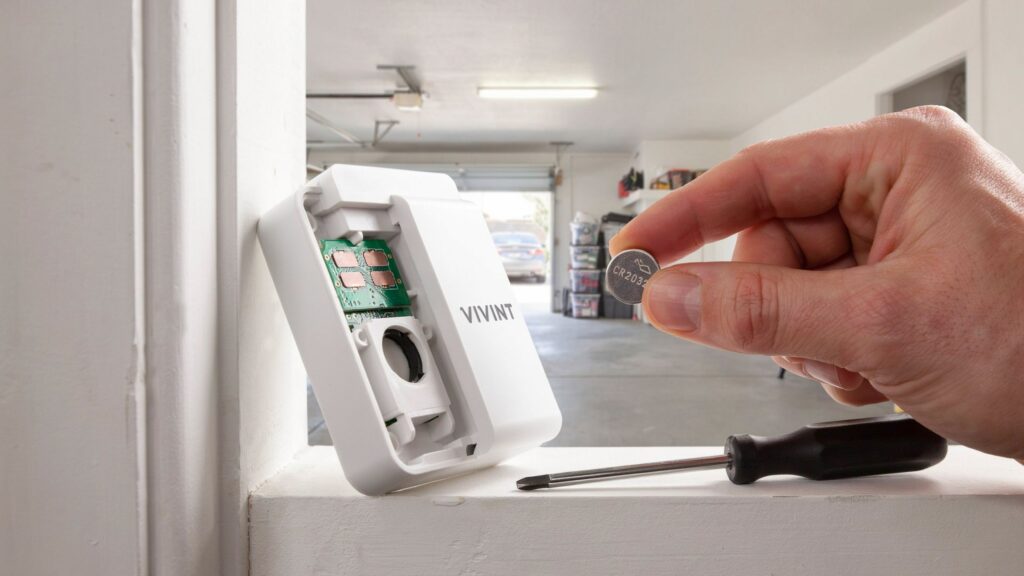
Inserting the New Battery the Right Way
Once the sensor is open, the old battery will be sitting right there. Do not rush this part.
Follow these steps carefully:
- Note the orientation of the old battery before removing it — take a quick photo with your phone so you remember which side faces up
- Remove the old battery gently — use your fingernail or a small flathead to pop it out without scratching the contacts
- Check the contacts inside — if you see any white residue or corrosion, wipe it gently with a dry cloth before inserting the new battery
- Insert the new battery in the exact same orientation — for CR2032 batteries, the positive side (marked with a + symbol) typically faces up
- Press it down firmly but gently until it sits flat and secure in the compartment
One small but important reminder — never touch the flat surface of the battery with oily or wet fingers. Natural skin oils can slightly reduce conductivity over time. Hold it by the edges when inserting.
Testing the Sensor After Replacement
Do not close everything up and walk away. Always test first.
Here is how to confirm your Vivint garage door sensor is working properly after the battery replacement:
- Replace the sensor cover and make sure it clicks or locks back into place securely
- Open your Vivint app on your phone and navigate to the device status section
- Manually open and close your garage door and watch for a real-time status update in the app
- Check that the low battery warning is cleared — it may take a minute or two to reset after the new battery is detected
- Trigger a test alert from the Vivint app if your system supports it, to confirm the sensor is communicating with the Smart Hub
If the sensor status updates correctly and the low battery notification disappears, you are done. Your garage door is fully protected again.
If the warning stays on or the sensor does not respond, double-check the battery orientation first — that solves the problem nine times out of ten.
How Often Should You Replace the Vivint Garage Door Sensor Battery?
Most homeowners only think about battery replacement when the Vivint app sends a low battery alert. But by that point, your sensor has already been running on fumes for a while. Waiting for the warning is not a strategy — it is a risk.
Here is what you actually need to know.
Average Battery Life
Under normal conditions, a Vivint garage door sensor battery lasts anywhere from 1 to 3 years. But that range is not random — several real-world factors affect how long your battery actually survives:
- How often your garage door opens and closes — a busy household that uses the garage multiple times a day will drain the battery faster than a single person who rarely uses it
- Extreme temperatures — if your garage gets very cold in winter or extremely hot in summer, battery life drops significantly. This is especially common in states like Minnesota, Texas, and Arizona where temperature swings are severe
- Battery brand quality — a cheap generic battery may last only 8 to 10 months while a Duracell or Energizer can comfortably hit the 2 to 3 year mark
- Sensor activity and signal frequency — the more your sensor communicates with the Vivint Smart Hub, the more power it consumes over time
A good rule of thumb for most American households is to replace the battery once every 12 to 18 months — even if no warning has appeared yet. Smart homeowners do not wait for things to break before they fix them. They stay one step ahead — because in home security, being reactive is always more expensive than being prepared.
Signs It Is Dying Before the Alert Shows Up
Your Vivint sensor often gives you quiet warning signs long before the official low battery notification appears in the app. Learning to recognize these early signals can save you from a real security gap.
Watch out for these signs:
- Delayed status updates — your garage door opens but the Vivint app takes longer than usual to reflect the change
- Inconsistent alerts — sometimes you get a notification, sometimes you do not, even though nothing else changed
- Sensor showing wrong status — the app says your garage door is closed but you can clearly see it is open
- More frequent signal drops — the sensor temporarily disappears from your Vivint panel and then reconnects on its own
- Low battery warning appearing and disappearing — this on-and-off behavior usually means the battery is right at the edge and about to give out completely
Any one of these signs is your cue to do a vivint garage door sensor battery replacement immediately — do not wait for the full warning or for the sensor to go completely offline.
Your garage door is one of the largest entry points in your home. A sensor running on a dying battery is not protecting that entry point — it is just pretending to.
Common Mistakes Homeowners Make During Vivint Garage Door Sensor Battery Replacement
Replacing a battery sounds simple — and it is. But simple tasks still have room for error, and when it comes to your home security, even a small mistake can leave you with a sensor that does not work the way you expect it to.
These are the most common mistakes American homeowners make during vivint garage door sensor battery replacement — and exactly how to avoid them.
Using the Wrong Battery Brand
This is the number one mistake, and it happens more often than you would think.
Someone runs to the nearest dollar store, grabs a cheap CR2032, pops it in, and assumes the job is done. Two months later the sensor is sending low battery warnings again — or worse, dropping offline without any warning at all.
Here is why this matters:
- Generic batteries deliver inconsistent voltage — your Vivint sensor needs stable, reliable power to communicate properly with the Smart Hub
- Cheap batteries have shorter shelf lives — they may already be partially drained sitting on a store shelf for months
- Off-brand batteries can trigger false low battery alerts — your Vivint app keeps warning you even though the battery is technically new
The fix is simple. Stick with Energizer, Duracell, or Panasonic. These brands cost a little more but they last significantly longer and perform consistently — which is exactly what a security sensor demands.
Not Testing the Sensor After Replacement
This one surprises people. They replace the battery, close the sensor back up, and walk away feeling like the job is done.
But what if the battery was inserted upside down? What if the contacts did not connect properly? What if the sensor casing was not closed securely and is now reading errors?
You would not know — until your garage door sits open one night and your Vivint app never sends a single alert.
Always test immediately after replacement:
- Open and close your garage door manually and confirm the status updates in your Vivint app in real time
- Check that the low battery warning has cleared from your notifications
- Confirm the sensor appears online in your Vivint device panel — not offline, not inactive
Thirty seconds of testing saves you from hours of frustration and a potential security gap you never knew existed.
Ignoring the Root Cause
Here is a mistake that goes deeper than the battery itself.
Sometimes a Vivint garage door sensor keeps draining batteries faster than normal — not because of the brand, not because of the temperature, but because something else is wrong. And homeowners keep replacing batteries without ever asking why.
If you find yourself replacing the battery every few months, consider these possible root causes:
- Sensor misalignment — if the two sensor pieces are not properly aligned, the sensor works overtime trying to maintain a stable reading, which drains the battery much faster
- Faulty sensor hardware — older sensors sometimes develop internal faults that cause excessive power draw even when the door is not moving
- Interference from nearby devices — wireless interference from garage door openers, Wi-Fi routers, or other smart home devices can force the sensor to retransmit signals repeatedly, burning through battery life quickly
If your battery life dropped suddenly from two years to two months, do not just replace the battery again. Inspect the sensor alignment, check for firmware updates in your Vivint app, and if the problem persists, contact Vivint support directly.
A battery is a two-dollar fix. A pattern of dead batteries is a sign that something bigger needs attention.
When Battery Replacement Isn’t Enough — What to Check Next
You did everything right. You bought a quality battery, replaced it carefully, tested the sensor, and waited. But the problem is still there. The sensor keeps dropping offline, the alerts are still inconsistent, or the low battery warning came back within weeks.
At this point, the battery was never really the problem.
This happens more than most people realize, and knowing what to check next can save you a lot of time, money, and unnecessary frustration. Here is where to look.
Sensor Misalignment
This is the most overlooked cause of Vivint garage door sensor problems — and the easiest to fix once you spot it.
Your Vivint garage door sensor works as a two-piece system. One piece mounts on the door frame and the other mounts on the door itself. When the door closes, these two pieces need to sit directly across from each other within a very small distance — usually no more than half an inch apart.
If they are even slightly off, here is what happens:
- The sensor struggles to confirm a closed position and keeps sending repeated signals to the Smart Hub
- Your Vivint app shows the door status flickering between open and closed even when the door has not moved
- The battery drains at two to three times the normal rate because the sensor never fully settles into a stable reading
- You get random false alerts in the middle of the night for no obvious reason
Check the alignment by visually inspecting both pieces of the sensor when the door is fully closed. They should be directly facing each other with no visible gap or angle. If they are off, loosen the mounting screws, reposition carefully, and tighten them back down. In most cases this single adjustment completely resolves the issue.
Faulty Sensor Needing Replacement
Sometimes the sensor itself has simply reached the end of its life — and no battery, no matter how good, is going to fix that.
Signs that your Vivint garage door sensor may need a full replacement rather than just a battery swap:
- The sensor repeatedly goes offline even with a brand new battery from a trusted brand
- Physical damage is visible — cracks in the casing, corrosion on the contacts, or moisture damage inside the battery compartment
- The sensor is more than five years old and has never been replaced — hardware degrades over time, especially in a garage environment exposed to temperature extremes and vibration
- Vivint app shows the sensor as unresponsive even after resetting it multiple times through the panel
If two or more of these apply to your situation, the honest answer is that you need a new sensor — not another battery. Continuing to replace batteries in a failing sensor is like putting fresh tires on a car with a broken engine. It does not solve anything.
Replacement Vivint garage door sensors are available directly through Vivint or through authorized retailers. Installation is straightforward and follows the same process as the original setup.
Contacting Vivint Support
If you have checked the alignment, replaced the sensor battery with a quality brand, and the problem is still happening — it is time to bring in the professionals.
Vivint has a dedicated customer support team available to help with exactly these kinds of issues. Here is how to reach them effectively:
- Call Vivint support directly at their customer service number — have your account information and sensor device ID ready before you call
- Use the Vivint app to submit a support request or initiate a live chat — this is often faster than calling during peak hours
- Request a technician visit if the issue cannot be resolved remotely — Vivint technicians can run a full diagnostic on your sensor, panel connection, and overall system health
When you call, be specific. Tell them exactly what you have already tried — the battery brand you used, the alignment check you performed, and how long the problem has been happening. The more detail you give, the faster they can diagnose and resolve it.
There is no shame in asking for help. Your home security system is not the place to troubleshoot indefinitely on your own. Vivint support exists for this exact reason — use it.
Conclusion
A dying battery should never be the reason your home is left unprotected.
Vivint garage door sensor battery replacement is one of the simplest maintenance tasks you will ever do — five minutes, a fresh battery, and your home security is fully restored. No technician needed. No complicated steps. Just you, a new battery, and the peace of mind that comes with knowing your garage is actually secure.
Do not wait for the low battery warning to force your hand. By then, your sensor may have already missed something important.
Take a moment right now and think — when did you last check that small sensor sitting on your garage door frame? If the answer makes you pause, that is your sign to act.
The smallest fix today can prevent the biggest regret tomorrow.
FAQs
Q: What kind of battery does Vivint garage door sensor use?
Most Vivint garage door sensors use a CR2032 coin battery or a CR123A battery depending on your specific model.
Q: How to change battery in Vivint garage door sensor?
Pop open the sensor casing, remove the old battery, insert a fresh CR2032 or CR123A in the correct orientation, and test it in your Vivint app.
Q: What kind of batteries do Vivint door sensors take?
Vivint door sensors typically take a CR2032 lithium coin battery — always check inside your sensor casing to confirm your exact model.
Q: How do I change the battery in my door sensor?
Open the sensor cover, swap the old battery with a new one, close it back securely, then verify the sensor is online in your Vivint app.
Q: How to open Vivint garage sensor?
Locate the small notch on the sensor casing, gently press or slide it open — never force it to avoid cracking the cover.
Q: How to change Vivint battery?
Remove the sensor cover, take out the old battery, insert a quality replacement like Energizer or Duracell, and confirm it works through your Vivint app.