

Introduction
Is your garage door refusing to close while the sensor light keeps flashing red? A garage door sensor flashing red can indicate a problem with sensor alignment, a blocked infrared beam, or an electrical connection. The exact meaning depends on your garage door opener model.
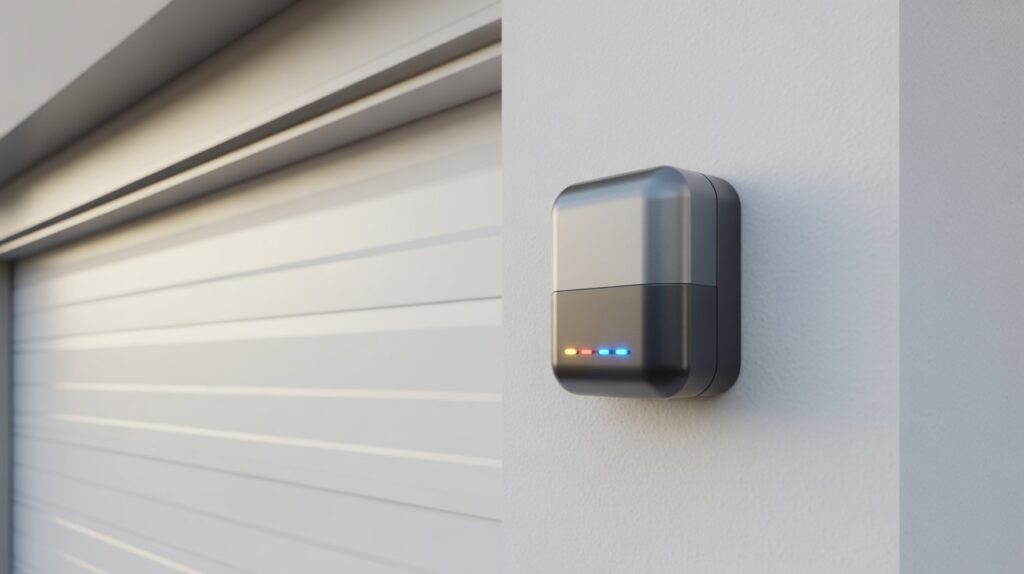
Safety sensors, also called photo-eye sensors, are usually mounted near the bottom of the garage door tracks. They detect objects in the door’s path and help prevent the door from closing when the safety beam is interrupted. Dust, loose brackets, direct sunlight, or damaged wiring can affect their operation.
In this guide, you’ll learn what different sensor light colors mean, how to identify common causes, and which troubleshooting steps to try before replacing parts or calling a garage door technician.
Table of Contents
Why Is Your Garage Door Sensor Flashing Red?
A flashing red light on a garage door safety sensor can indicate a problem with the sensor signal, alignment, wiring, or power supply. However, the exact meaning depends on the garage door opener brand and model. Before replacing any parts, check both photo-eye sensors, clean their lenses, and inspect the wiring for visible damage.
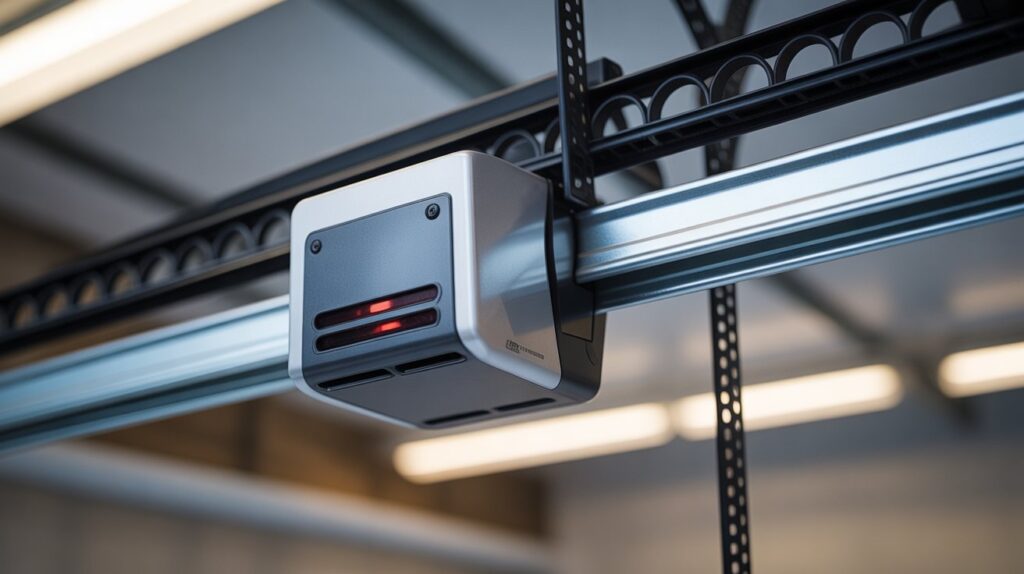
Most modern garage door openers use two safety sensors mounted near the bottom of the door tracks. These photo-eye sensors send an invisible infrared beam across the garage door opening. If an object blocks the beam or the sensors cannot communicate properly, the opener may prevent the door from closing automatically.
Common Causes of a Red Flashing Sensor Light
Several problems can affect garage door safety sensors. Start with the simplest checks before considering repairs or replacement.
- Dirty sensor lenses: Dust, cobwebs, and dirt can interfere with the infrared beam and prevent the sensors from detecting each other correctly.
- Misaligned photo-eye sensors: A loose bracket, accidental bump, or vibration may move one sensor out of position.
- Sunlight interference: Direct sunlight can interfere with some receiving sensors, particularly when the sun shines directly into the lens.
- Loose or damaged wiring: Pinched wires, loose terminal connections, corrosion, or damaged insulation can interrupt the sensor signal.
- Objects blocking the safety beam: Tools, storage boxes, bins, and other items near the garage door tracks can obstruct the infrared path.
- Faulty sensor components: If cleaning, alignment, and basic wiring checks do not solve the problem, a sensor or its connection may have failed.
Keep in mind that a red indicator does not always mean the sensor is defective. Some models use different LED colors or blinking patterns to indicate normal operation, a blocked beam, or a fault. Check the manual for your specific opener before deciding what the light means.
What Does the Red Sensor Light Mean?
The meaning of a red or flashing LED varies by manufacturer. On some systems, the sending sensor has a steady indicator while the receiving sensor shows whether it is detecting the infrared beam. Other models use different colors and diagnostic patterns.
Use these observations as a starting point rather than a universal diagnosis:
- One sensor light is off: Check the power supply, sensor wiring, and connections. A loose wire or failed component may prevent the unit from receiving power.
- The receiving sensor light flickers: Check for misalignment, vibration, sunlight interference, or an unstable electrical connection.
- Both sensor lights appear normal, but the door will not close: Look for another obstruction, inspect the opener’s diagnostic indicator, and consult the model-specific troubleshooting guide.
- The door reverses before reaching the floor: The safety sensors may be involved, but travel limits, track obstructions, or other opener problems can also cause this behavior.
For a related troubleshooting guide, see why garage door sensors have no lights.
Why You Should Fix a Sensor Problem Promptly
Garage door photo-eye sensors are an important part of the automatic closing safety system. If the opener detects a problem, it may refuse to close the door using the remote or may reverse the door when an obstruction is detected.
Leaving the problem unresolved can cause several practical issues:
- The garage door may remain open: This can leave vehicles and stored belongings exposed and reduce the security of an attached garage.
- Automatic closing may stop working: You may need to troubleshoot the sensor system before the opener will operate normally again.
- Someone may try to bypass the safety system: Defeating or disconnecting the sensors can increase the risk of injury or property damage.
Never assume the safety system is working correctly just because the door moves. Keep people and pets away from the opening while troubleshooting, and do not bypass the photo-eye sensors to force the door closed.
What to Check Before Replacing the Sensors
Before buying replacement parts or arranging a service visit, complete these basic checks:
- Remove objects from the sensor beam path.
- Clean both photo-eye lenses gently with a soft, dry microfiber cloth.
- Check whether either sensor bracket is loose, bent, or visibly out of alignment.
- Inspect the exposed sensor wires for cuts, pinching, or loose connections.
- Consult the opener’s manual to identify the correct LED pattern and recommended troubleshooting steps.
Disconnect power before performing any wiring work, and do not open electrical components unless you are qualified to do so. If the sensor indicator continues flashing or the opener does not operate safely, contact a qualified garage door technician.
Important: The red light alone cannot confirm that a sensor needs replacement. Identify the opener model and check its manufacturer’s instructions before purchasing new parts.
Understanding Garage Door Sensor Light Colors: Red vs. Yellow vs. Green
Garage door sensor lights help homeowners identify possible problems with the safety system. Depending on the opener model, a red, yellow, amber, or green LED may indicate the sensor’s power status or whether the infrared safety beam is working correctly. However, these colors do not mean the same thing on every garage door opener, so check the manufacturer’s instructions before diagnosing a fault.
Red Sensor Light
A red indicator can be normal on some garage door safety sensors, while a flashing or changing light may indicate an issue on other models. The meaning depends on which sensor has the red light and how the manufacturer designed the system.
If the indicator is flashing and the garage door will not close, check for:
- Misaligned photo-eye sensors near the bottom of the door tracks.
- Dust or cobwebs covering the sensor lenses.
- Objects blocking the infrared safety beam.
- Loose, pinched, or damaged sensor wiring.
- Direct sunlight interfering with the receiving sensor.
Do not assume that every red light means the sensor has failed. Compare the indicator pattern with the troubleshooting instructions for your specific opener.
Yellow or Amber Sensor Light
On many Chamberlain, LiftMaster, and compatible systems, the sending sensor has a yellow or amber indicator. This light commonly shows that the transmitter has power.
A steady yellow light may be normal even when the garage door has another problem. If the door does not close, check whether the receiving sensor is aligned and detecting the infrared beam. Also inspect the wiring and look for obstructions between the two photo-eye sensors.
The exact indicator behavior can vary by model, so use the opener’s manual to confirm what the light means.
Green Sensor Light
On many compatible garage door openers, a green indicator appears on the receiving sensor. A steady green light commonly indicates that the sensor is receiving the infrared signal.
If the light is off, flickering, or changing unexpectedly, check the sensor alignment, wiring connections, and beam path. However, a green light alone does not guarantee that every part of the garage door safety system is working correctly.
Always keep the sensor lenses clean and make sure both units remain securely mounted near the floor.
Why Garage Door Sensor Light Colors Matter
Understanding the sensor indicators can help you narrow down the cause of a garage door closing problem without replacing parts unnecessarily.
Use these general guidelines:
- Red indicator: Check the model-specific meaning before assuming there is a fault.
- Yellow or amber indicator: May show that the sending sensor has power.
- Green indicator: May show that the receiving sensor is detecting the safety beam.
- No indicator light: Check the power supply, exposed wiring, and manufacturer troubleshooting instructions.
- Flickering indicator: Look for movement, misalignment, sunlight interference, or an unstable connection.
These are general patterns, not universal rules. If the indicators do not match the expected pattern in your opener’s manual, follow the manufacturer’s diagnostic steps.
Diagnosing the Cause of a Flashing Sensor Light
A flashing or changing sensor indicator can point to an interrupted signal, an alignment issue, or an electrical connection problem. The opener may prevent the garage door from closing automatically when its safety sensors cannot confirm that the doorway is clear.
Start by removing anything blocking the infrared beam. Next, clean both sensor lenses and check whether the brackets are secure and correctly aligned. Inspect exposed wiring for visible damage, but disconnect power before carrying out wiring work.
If the indicator continues flashing after these checks, consult the opener’s diagnostic guide. The problem may involve a faulty sensor, damaged wiring, or another part of the opener system.
Safety reminder: Never bypass the photo-eye sensors or force the garage door to close when the safety system is not operating correctly. If the cause remains unclear, contact a qualified garage door technician.

How to Fix a Flashing Red Garage Door Sensor (Step-by-Step)
Fixing this is often simpler than it looks—most homeowners can handle it without special tools. Focus on safety first, since these sensors are sensitive and small adjustments can restore operation quickly.
Step 1: Realign the Safety Sensors
Check that both sensors face each other directly. If one is tilted or slightly out of position, the safety beam breaks and triggers the red light. Gently adjust both sensors until they’re level and pointing straight across the opening—for exact mounting height and positioning, see our garage door sensor bracket guide. In most cases, the flashing stops as soon as alignment is restored.
Step 2: Clean the Sensor Lenses
Dust, dirt, or moisture can block the beam without being obvious. Wipe each lens carefully with a soft, dry cloth—avoid harsh cleaners, as they can damage the surface. A clean lens often resolves the issue immediately.
Step 3: Check the Wiring and Connections
Inspect the sensor wires along the garage wall and tracks. Make sure they’re secure and not pinched, frayed, or loose. Even a slightly disconnected wire can interrupt the signal—once wiring is stable, the sensors communicate properly again.
Can a Flashing Red Sensor Prevent Your Garage Door From Closing?
Yes, a garage door sensor flashing red will completely stop your garage door from closing. This auto-stop behavior is not a mechanical defect—it is an intentional safety feature mandated by US safety standards (UL 325) to prevent severe injuries and property damage.
When the receiving safety eye detects a broken infrared beam, misaligned mounting brackets, or a wiring fault, it immediately signals the opener motor to halt and reverse direction.
How the Safety Reverse System Works
- Obstacle Detection: If an object, vehicle bumper, pet, or child crosses the invisible optical beam while the door is moving downward, the receiving sensor trips instantly.
- Immediate Reversal: The main logic board stops the motor and forces the door to open back up completely to avoid crushing the object.
- Visual Alert: The sensor LED blinks red, and the main opener light bulbs will often flash 10 times to indicate a photo-eye safety error.
What Happens If You Ignore the Red Blinking Light?
- Home Security Risk: The garage door will remain open, leaving your home and stored valuables exposed to unauthorized entry.
- Potential System Wear: Forcing the door shut by continuously holding down the wall button bypasses safety controls and puts unnecessary strain on the trolley, cables, and motor gears.
- Safety Hazards: Disregarding the sensor warning increases the risk of the door closing on family members or vehicles.
Key Takeaway: Fixing the underlying issue—whether it is realigning the photo-eyes, clearing dirt off the lens, or repairing loose white-and-black low-voltage wires—restores smooth, automatic operation. Once the infrared connection is re-established, the receiving LED turns solid, and your garage door will close safely again.
When a Flashing Red Sensor Is Normal vs. When It Signals a Problem
A garage door sensor flashing red does not always indicate a system failure or a costly repair. In many cases, a brief or temporary blink is simply evidence that the safety photo-eyes are actively monitoring the door opening.
Understanding the distinction between temporary operational triggers and persistent system faults saves time, reduces homeowner anxiety, and prevents unnecessary service calls.
Scenario A: When a Blinking Red Sensor Is Normal Operation
During routine daily use, a receiving sensor LED may blink red temporarily due to momentary external triggers:
- Transient Beam Interruption: A family member, pet, vehicle, or falling leaf momentarily crosses the invisible infrared line.
- Direct Sunlight Glare: Intense sunlight directly striking the optical lens can briefly overwhelm the receiving sensor.
- Door Movement Vibration: Normal vibration during startup may cause slight momentary fluctuations in the optical beam path.
In these instances, the momentary red flash confirms that your opener’s safety reverse system is responsive and functioning according to UL 325 safety guidelines. Once the obstruction passes or the light shifts, the receiving LED stabilizes back to a solid light, allowing normal closing.
Scenario B: When a Flashing Red Light Indicates a System Error
If the red light blinks continuously and prevents the garage door from closing, the system has locked in safety mode. Persistent flashing typically points to one of four core issues:
- Physical Misalignment: The sending and receiving photo-eyes are tilted or shifted out of direct line-of-sight along the vertical tracks.
- Lens Contamination: Heavy dust, debris, or spiderwebs covering the glass lens block the infrared signal path.
- Low-Voltage Wiring Defects: Corroded terminal connections, loose staple connections, or frayed wires along the garage wall.
- Permanent Beam Obstruction: Lawn tools, trash bins, or storage boxes sitting directly in the sensor pathway.
Quick Diagnostic Comparison
| Sensor Behavior | System Status | Recommended Action |
| Blinks once/twice, then turns solid | Normal safety detection | No action required; system self-corrected. |
| Continuous rapid red blinking | Optical misalignment or blocked beam | Clean lenses and realign sensor brackets until light stays solid. |
| Flashing red with 10 opener light flashes | Safety reverse triggered (UL 325) | Inspect lower track area for hidden obstructions or loose wiring. |
| No light on either sensor | Power failure or broken wire | Inspect low-voltage wire connections and check circuit breaker. |
Pro Tip: If the red light flashes continuously even when the path is clear, use a soft microfiber cloth to clean both lenses and gently adjust the receiving bracket until the LED turns solid red or green (depending on your opener brand).
When to Call a Professional Garage Door Technician
A flashing red sensor can sometimes signal a deeper issue that needs expert attention. While most problems are simple DIY fixes, knowing when to call a professional prevents costly damage and ensures the repair is done right.
Call a professional if:
- The red light persists despite alignment, cleaning, and wiring checks—there may be a hidden electrical or sensor fault
- You notice damaged wires, broken mounts, or loose components
- The door behaves unpredictably—jerky movements, sudden reversals, or no response
- You’re unsure whether your setup meets safety compliance, per DASMA’s garage door safety standards
Calling a professional when needed prevents accidents, extends your system’s lifespan, and gets the issue resolved safely and efficiently.

How to Prevent Garage Door Sensor Problems in the Future
Regular maintenance helps keep garage door safety sensors clean, properly aligned, and ready to detect obstructions. A few simple checks can reduce the chances of unexpected closing problems and help you identify loose brackets, damaged wires, or blocked photo-eye sensors before they affect normal operation. If your sensors need attention, follow our guide on cleaning garage door sensors or learn how to align garage door sensors correctly.
For US homeowners, checking the safety sensors during routine home maintenance is a practical way to keep the automatic garage door system working reliably throughout the year.
Garage Door Sensor Maintenance Checklist
1. Clean Both Sensor Lenses Regularly
Dust, cobwebs, pollen, and dirt can collect on the photo-eye lenses and interfere with the infrared safety beam. Gently wipe both sensor lenses with a soft, dry microfiber cloth. Avoid abrasive materials and harsh cleaning products that could damage the lens or sensor housing.
2. Check Sensor Alignment and Mounting Brackets
Garage door vibrations or accidental bumps can move the sensors out of position. Check that both photo-eye sensors remain securely mounted near the bottom of the door tracks and face each other correctly.
If a bracket is loose or bent, follow the manufacturer’s instructions before making adjustments. Avoid overtightening hardware or bending a bracket while the opener is powered.
3. Inspect Exposed Sensor Wiring
Look for visible cuts, crushed insulation, loose wires, or signs of corrosion around accessible connections. Damaged low-voltage wiring can interrupt the sensor signal and cause inconsistent operation.
Disconnect power before performing wiring work. Do not strip, splice, or reconnect wires unless you know how to do so safely. Have damaged wiring repaired by a qualified technician.
4. Reduce Direct Sunlight Interference
Direct sunlight can interfere with some receiving photo-eye sensors, especially when sunlight shines straight into the lens at certain times of day.
If the indicator flickers when sunlight reaches the sensor, check the opener manufacturer’s recommendations for dealing with glare. Use only compatible sun shields or other approved solutions. Do not swap sensor positions or change the wiring unless the manufacturer specifically permits it.
5. Keep the Sensor Beam Path Clear
Keep rubbish bins, bicycles, garden tools, sports equipment, and storage boxes away from the infrared beam. Even a small object in the path can prevent the sensors from detecting each other correctly.
Check the area around both sensors whenever you notice unexpected reversing or problems closing the door. Make sure the sensors are not being bumped by vehicles, pets, or stored belongings.
6. Check the Sensor Indicators
Observe the indicator lights on both photo-eye sensors during normal operation. Learn what the steady and flashing lights mean for your particular garage door opener.
If an indicator changes unexpectedly or the door refuses to close, inspect the beam path and sensor alignment first. Consult the owner’s manual if the light pattern does not match normal operation.
When Should You Call a Garage Door Technician?
Basic lens cleaning and visual inspections are suitable for most homeowners. However, some problems require professional diagnosis and repair.
Arrange a service visit if you notice any of the following:
- The safety sensors keep losing their signal: The indicator continues flickering after you clean the lenses and check alignment.
- The wiring is damaged: Wires have exposed conductors, crushed insulation, or loose connections that need repair.
- The mounting brackets or tracks are bent: The sensors cannot remain correctly aligned because their mounting points are damaged.
- The garage door behaves unpredictably: The door reverses without an obvious obstruction or refuses to close despite apparently normal sensor indicators.
- The safety reversal test fails: The garage door does not respond correctly during the manufacturer’s recommended safety test.
Do not attempt to repair a damaged torsion spring, lift cable, or other high-tension door component yourself. These parts can cause serious injuries if handled incorrectly.
Test the Garage Door Safety System
Follow the safety-testing procedure in your opener’s owner’s manual. Many residential openers use a specified test object, such as a 1½-inch-high solid object, to check whether the door reverses when it contacts an obstruction. The exact procedure depends on the model.
Never place your hands, feet, or any part of your body beneath a moving door to test its safety features. If the door fails the prescribed test, stop using the automatic closing function and arrange a professional inspection.
Key takeaway: Clean sensor lenses, keep the beam path clear, inspect visible wiring, and check the mounting brackets regularly. These simple habits help maintain reliable operation, but they do not replace proper safety testing or professional repairs when a fault persists.
Conclusion
A garage door sensor flashing red is far more than an annoying inconvenience—it is proof that your garage door opener’s safety system is actively protecting your home, vehicles, and family from accidents. By recognizing that a blinking red LED points to optical misalignment, lens dirt, or broken wiring rather than a dead motor, you can troubleshoot and fix the issue in minutes without paying for unnecessary repairs.
Understanding status lights on different opener brands is key to fast troubleshooting. If your receiving sensor displays an amber or steady status light instead, check our complete troubleshooting guide on the LiftMaster yellow light meaning to diagnose sending-eye power and signal issues.
Taking five minutes today to clean your photo-eye lenses, hand-tighten track brackets, and check low-voltage wiring guarantees your automated garage system remains safe, reliable, and secure year-round.
FAQs
Q1: Why is my garage door sensor blinking red instead of staying solid?
A garage door sensor flashing red indicates that the invisible infrared safety beam between the sending and receiving photo-eyes is interrupted or misaligned. Common causes include dirt or cobwebs on the glass lens, loose track mounting brackets, direct sunlight interference, or an object blocking the sensor pathway.
Q2: Can a flashing red sensor damage my garage door opener motor?
No, a flashing red light will not damage your opener motor. It is a built-in protective feature engineered to halt the door and prevent property damage or injury. However, repeatedly attempting to force the door closed by holding down the wall switch can put unnecessary stress on the logic board and drive gears.
Q3: How long does it take to fix a flashing red garage door sensor?
In over 80% of cases, fixing a red blinking sensor takes under 10 minutes. Simple tasks like wiping the optical lenses with a microfiber cloth, hand-tightening wing nuts, or gently realigning the brackets until the LED stays solid require no special tools.
Q4: Does a flashing red light mean I need to replace my garage door sensors?
Rarely. A blinking red LED confirms that the sensor unit has electrical power. The issue is almost always external—such as physical misalignment, dirty lenses, or loose white-and-black low-voltage wiring—rather than a completely failed sensor unit.
Q5: Why does my garage door immediately reverse when the sensor blinks red?
Your garage door reverses automatically to comply with UL 325 safety standards. When the receiving eye detects a broken beam, the logic board assumes an obstacle, child, or vehicle is in the doorway and immediately reverses direction to prevent an accident.
About the Author
M. Bilal Khan | Home Security Writer at CrimTechHub
M. Bilal Khan has a BS in Criminology and an interest in home security technology. At CrimTechHub, he writes about garage door sensors, home security cameras, smart security devices, and residential safety systems. His goal is to explain common technical problems in clear, practical language so homeowners can better understand their options, follow appropriate safety precautions, and know when professional assistance may be needed.

Pingback: Do Garage Door Sensors Go Bad? Signs & Fixes