Introduction
Worried about securing your home but don’t want to drill into your walls or siding? You’re not alone — for renters especially, that fear is often what stops security camera installation altogether.
This guide covers exactly how to mount an outdoor security camera without screws — using adhesive, magnetic, and clamp mounts — so you get real protection without damaging walls, breaking your lease, or risking your deposit.
Table of Contents
Why Homeowners Are Looking for Screw-Free Camera Mounting Solutions
For renters and homeowners alike, drilling into an exterior wall is rarely a casual decision. Apartments, HOA-managed properties, and rental leases often restrict permanent changes outright — and once you drill into brick, vinyl, or stucco, there’s no clean way to undo it.
Flexibility matters just as much. Camera angles need adjusting, motion alerts from passing cars get annoying, and renters who might move within a year don’t want to commit to a fixed installation. Screw-free mounts solve this directly — repositioning takes seconds, not a repair job.
Wall material adds another layer. Brick and concrete can crack under drilling, hidden wiring is a real risk in older homes, and every hole is a potential point where moisture gets in over time. Avoiding screws sidesteps all of that.
If you’re still deciding which camera to pair with a no-drill mount, our cloud-based security camera guide covers models that work well with adhesive and magnetic setups.
Is It Really Safe to Mount an Outdoor Security Camera Without Screws?
Short answer: it depends entirely on the setup. Adhesive mounts, magnetic bases, and clamp systems all work reliably — but only when matched to the right surface and camera weight.
- Adhesive and magnetic mounts perform well with lightweight, battery-powered cameras on vinyl siding, metal surfaces, smooth wood, or gutters
- Safety issues usually come from ignoring load limits — adhesive load ratings are typically measured in pounds per square inch, and mounting a camera beyond that rating is the most common cause of failure
- Rough, dusty, or uneven surfaces weaken any mount type, regardless of quality
- Heavy wired cameras, uneven brick, or high-vibration areas are where screw-free mounting struggles most — traditional mounting still wins there
The real question isn’t whether no-drill mounting works — it’s whether your specific camera and surface combination is a good match for it.
Situations Where Screw-Free Mounting Makes the Most Sense
Renters and Apartments
Drilling isn’t optional for most renters — lease agreements and HOA rules typically prohibit permanent wall changes, and repairs at move-out can get expensive fast. Screw-free mounts sidestep that entirely, letting you add real security without risking your deposit.
If budget is also a factor, our guide on affordable security cameras that connect to your phone pairs well with no-drill setups for renters starting from scratch.
Brick, Vinyl, and Metal Siding
Certain exterior surfaces make drilling risky or impractical. Brick and concrete can crack, vinyl siding can warp, and metal siding may rust after drilling. In these cases, screw-free mounting provides a safer alternative that avoids structural damage. Adhesive, magnetic, or clamp-based solutions are often more reliable for these surfaces when used correctly and within weight limits.
Temporary or Test Placements
Sometimes homeowners just want to test camera placement before making anything permanent. Motion detection zones, lighting conditions, and viewing angles often need adjustment. Using no-drill mounting makes it easy to move and reposition cameras without tools. This flexibility helps homeowners confidently decide the best location before committing, while still keeping their property damage-free.
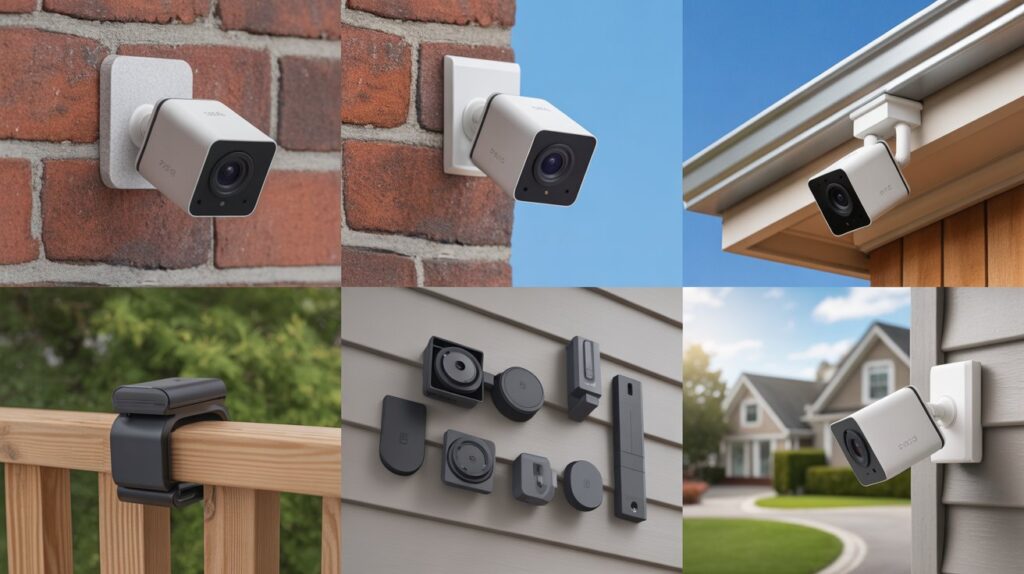
Types of Outdoor Security Cameras That Work Best Without Screws
Not every security camera suits no-drill installation — but certain types are a natural fit. Cameras that succeed with screw-free mounts tend to share three traits: they’re lightweight, battery-powered, and wireless, which keeps strain off the mount and holds up in real outdoor conditions.
For a closer look at models built with this kind of flexibility in mind, see our cloud-based security camera guide — most wireless options there pair naturally with adhesive or magnetic mounts.
The best-performing options usually share a few key features that make screw-free mounting both safe and reliable:
- Lightweight cameras that don’t put excess strain on adhesive or magnetic mounts
- Battery-powered models that eliminate the need for drilling holes to run wires
- Wireless outdoor cameras that connect over Wi-Fi, making placement more flexible
- Compact designs that handle wind and weather better when mounted without screws
In everyday use, these cameras suit renters, homeowners testing camera placement, and anyone who wants a clean install without damage. The camera and the mount need to match — get either one wrong, and even the best mounting method won’t hold up long-term.
Using Adhesive Mounts: The Most Popular No-Drill Option
Adhesive mounts are one of the most trusted solutions when people look for how to mount an outdoor security camera without screws. They’re easy to install, don’t damage walls, and work well for renters and homeowners who want a clean setup. When used correctly, high-quality adhesive mounts can hold outdoor cameras securely for long periods, even in changing weather conditions common across the U.S.
What Kind of Adhesive Actually Holds Outdoors
Not all adhesives are made for outdoor use. The most reliable mounts use industrial-grade adhesive designed to bond with smooth surfaces like vinyl siding, sealed wood, metal, or painted walls. These adhesives create a strong grip once properly set, reducing the risk of cameras shifting or falling. Choosing a mount specifically labeled for outdoor security cameras is essential for long-term safety and performance.
Weather Resistance and Weight Limits
Outdoor environments can be tough, with heat, cold, rain, and wind constantly testing the mount. Quality adhesive mounts are built to handle temperature changes and moisture without weakening. However, weight limits matter. Lightweight, battery-powered cameras perform best, while heavier models may require a different mounting method. Respecting these limits is key to mounting an outdoor security camera without screws safely and with confidence.
Mounting Outdoor Security Cameras with Magnetic Bases
- Magnetic mounts are a smart choice for homeowners who want how to mount an outdoor security camera without screws on metal surfaces without tools or damage.
- They work best on steel siding, metal poles, gutters, and other solid metal areas commonly found on U.S. homes and garages.
- Strong magnetic bases create a tight hold that keeps lightweight outdoor security cameras stable, even during wind or light vibration.
- This option is ideal for people who want quick installation and easy repositioning without leaving marks or holes behind.
- Magnetic mounts are especially useful for testing camera angles, motion detection zones, or temporary security setups.
- For best results, the metal surface should be clean, flat, and rust-free to ensure maximum grip and long-term reliability.
- When paired with a lightweight, wireless camera, magnetic mounting offers a secure and stress-free way to protect your home without drilling.
Clamp Mounts and Gutter Mounts: No Damage, Strong Hold
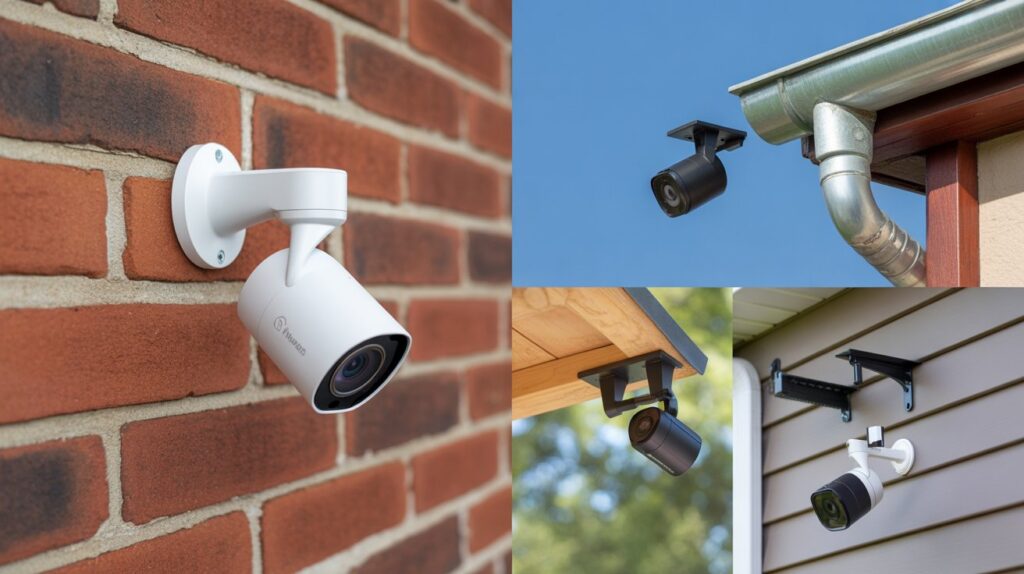
Clamp and gutter mounts are excellent solutions for homeowners looking to mount an outdoor security camera without screws while maintaining a secure hold. These mounts are designed to attach firmly without altering walls or siding, making them renter-friendly and ideal for temporary or adjustable setups.
Gutter Mounts for Roof-Level Views
- Gutter mounts allow cameras to capture wide, roof-level perspectives, perfect for monitoring driveways, yards, or entryways.
- They clip securely over gutters without bending or damaging the metal.
- Many models include adjustable angles, letting homeowners fine-tune the view for motion detection or lighting conditions.
- Ideal for U.S. homes with elevated gutters where drilling is difficult or prohibited.
Pole and Railing Clamp Mounts
- Clamp mounts can attach to metal poles, railings, fences, or posts, providing stable support without screws.
- They are perfect for deck rails, garden fences, or freestanding poles around the property.
- Adjustable clamps ensure cameras remain level and secure even in windy conditions.
- This mounting style combines flexibility, strong hold, and zero damage—ideal for renters, temporary setups, or testing camera placement.
Using clamp or gutter mounts ensures a reliable, screw-free installation while giving homeowners control over camera angles and coverage, making mounting an outdoor security camera without screws both practical and safe.
How to Prepare the Surface for a Secure Screw-Free Installation
Preparing the surface correctly is essential when mounting an outdoor security camera without screws. Even the strongest adhesive, magnetic, or clamp mount can fail if the surface is dirty, uneven, or exposed to extreme conditions. A few simple steps can make a huge difference in keeping your camera secure and stable over time.
- Clean the surface thoroughly: Remove dust, dirt, grease, or loose paint using a damp cloth or rubbing alcohol. A clean surface ensures maximum adhesion or grip.
- Check the temperature: Many adhesives perform best between 50°F and 100°F. Avoid applying mounts in extreme heat or freezing conditions for optimal hold.
- Choose the right height: Mount cameras at eye-level or slightly higher to capture clear facial features and motion while preventing tampering.
- Consider the angle: Position cameras to cover entrances, driveways, or yards without obstructions. Slight downward angles reduce glare from sunlight or porch lights.
- Dry completely before mounting: Make sure the surface is fully dry to prevent weakening of adhesives or slipping of magnetic mounts.
- Test lightly before final placement: Press the mount gently first to ensure it sticks or clamps properly, then let adhesives set as per manufacturer instructions.
By following these preparation steps, homeowners can confidently install their cameras and enjoy a strong, reliable screw-free setup that protects their home without causing damage.
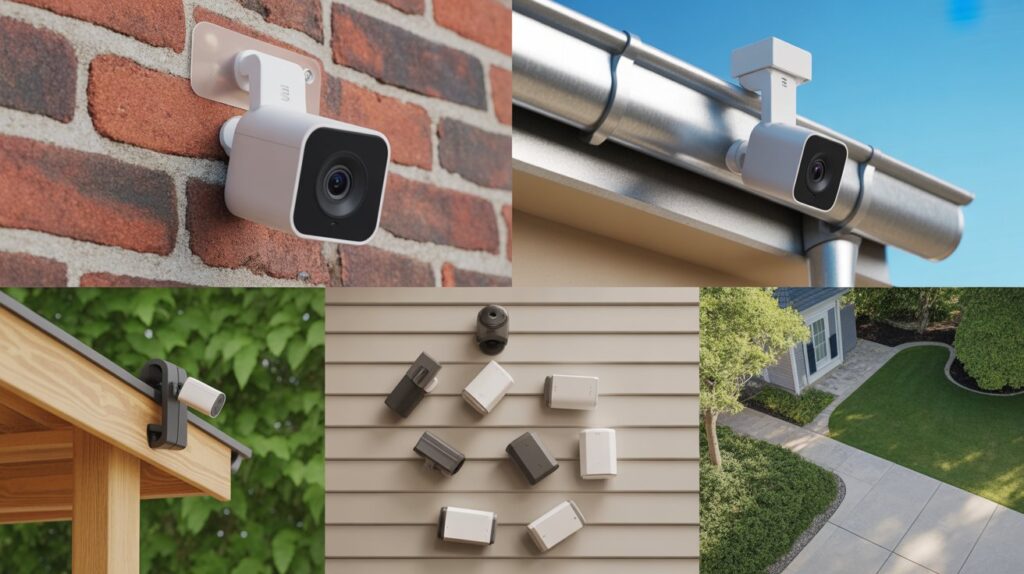
Step-by-Step: How to Mount an Outdoor Security Camera Without Screws
Mounting an outdoor security camera without screws is easier than many homeowners think, as long as you follow a few simple steps. This method is perfect for renters, people with delicate siding, or anyone who wants a clean, no-drill installation while still keeping their property secure. Here’s a practical, real-world approach:
- Choose the right camera and mount: Opt for lightweight, battery-powered, or wireless cameras compatible with adhesive, magnetic, or clamp mounts.
- Select the ideal location: Look for a high vantage point that covers entrances, driveways, or yards. Avoid obstructed views and consider glare from sunlight or outdoor lights.
- Prepare the surface: Clean it thoroughly, ensure it’s dry, and check the temperature for optimal adhesion. Smooth, flat surfaces provide the best hold.
- Attach the mount:
- For adhesive mounts: Peel off protective layers and press firmly for 30–60 seconds.
- For magnetic mounts: Align the camera with the metal surface and let the magnet secure it.
- For clamp or gutter mounts: Open the clamp, place it over the rail, pole, or gutter, and tighten until secure.
- For adhesive mounts: Peel off protective layers and press firmly for 30–60 seconds.
- Position and angle the camera: Adjust the tilt and rotation to capture the desired field of view. Most mounts allow slight adjustments after installation.
- Test stability: Gently shake or nudge the mount to ensure it’s secure. Let adhesive mounts set for the recommended time before final use.
- Connect and power on: Insert batteries or charge the camera, connect to Wi-Fi if needed, and test motion detection or alerts.
Follow these steps and you get reliable coverage without damaging walls, siding, or gutters — no drilling, no repairs, no compromise on security.
If you’re weighing whether to rely on Wi-Fi for your setup, our guide on security cameras that work without Wi-Fi or internet is worth checking before you finalize your camera choice.
Common Mistakes to Avoid When Installing Without Screws
- Choosing the wrong surface: Installing on rough, dusty, or uneven surfaces can weaken adhesive or magnetic mounts. Smooth, clean surfaces provide the best hold.
- Ignoring weather exposure: Extreme heat, freezing temperatures, or constant moisture can affect adhesives or cause mounts to slip. Always check weather resistance before installation.
- Mounting too high or too low: Placing cameras too high can reduce facial recognition or motion detection accuracy, while mounting too low may leave the camera vulnerable to tampering.
- Overloading mounts: Using heavy cameras on adhesive or magnetic mounts can cause them to fall, damaging both the camera and property.
- Skipping preparation steps: Not cleaning, drying, or setting the mount properly reduces long-term stability. Proper surface prep is essential for secure screw-free installation.
- Neglecting periodic checks: Even well-mounted cameras should be checked occasionally to ensure they remain secure and aligned, especially after storms or strong winds.
Following these tips helps homeowners safely and effectively install cameras without screws while avoiding common pitfalls, keeping both their home and security system reliable.
How Long Do Screw-Free Mounts Last Outdoors?
Realistic expectations matter here — lifespan depends on mount type, camera weight, surface quality, and weather exposure.
- Adhesive mounts – typically hold for 6–12 months outdoors on clean surfaces; UV exposure is the main factor that breaks down adhesive bonds over time, so direct sun exposure shortens this considerably
- Magnetic mounts – can last several years on solid metal, provided the surface stays rust-free and the magnet is checked periodically
- Clamp and gutter mounts – generally the most durable option, often lasting multiple years with occasional inspection for shifting or wear
Maintenance that actually extends lifespan:
Replace adhesive mounts proactively rather than waiting for failure
Clean surfaces periodically to remove dust and grime buildup
Check stability after major storms or high winds
Conclusion
Whether you go with adhesive, magnetic, or clamp-based mounts, the right choice comes down to your surface and camera weight — get that match right, and you get real security without touching a drill.
If you’re still finalizing your camera setup, our home security systems guide covers how cameras fit into a broader home protection plan, beyond just the mounting method.
FAQs
How do you mount an outdoor security camera without screws safely?
Use adhesive, magnetic, or clamp mounts on clean, flat surfaces for a secure hold.
Can adhesive mounts hold outdoor cameras on brick or siding?
Yes, industrial-strength adhesives work well on smooth brick, vinyl, or painted siding.
What types of cameras work best for screw-free installation?
Lightweight, battery-powered, and wireless cameras are ideal for no-drill mounting.
How do you attach a Ring camera without drilling holes?
Use its compatible adhesive or clamp mounts designed for screw-free installation.
Are magnetic mounts reliable for outdoor security cameras?
Yes, they provide strong, flexible placement on metal surfaces without damaging walls.
About the Author
M Bilal writes about home security systems, camera installation, and property protection for CrimTechHub, drawing on a BS in Criminology to focus on practical, damage-free ways homeowners and renters can secure their property.
This guide draws on manufacturer mounting specifications and general adhesive/hardware engineering references, and is reviewed for accuracy before publishing. Individual results can vary by surface, camera weight, and local weather conditions — when in doubt, check your specific camera’s mounting guidelines before installing.