Introduction
A garage door that stops mid-close or won’t shut properly is rarely a motor issue — it’s usually a wiring problem. In most U.S. homes, the cause is a loose, reversed, or damaged connection in the safety sensor wiring.
This guide breaks down the garage door sensor wiring schematic in plain terms: how the sending and receiving sensors connect to the opener, why polarity matters, and how to spot the wiring mistakes that stop your door from closing safely.
Table of Contents
Understanding the Basics of a Garage Door Sensor Wiring Schematic
Before you try to fix anything, it helps to understand what a garage door sensor wiring schematic actually shows. Simply put, it’s a diagram that explains how the safety sensors connect to your garage door opener. It maps out the wire paths, terminal connections, and electrical flow between the sensors and the opener’s control board.
Think of it like a road map for your garage door system. Instead of guessing where each wire goes, the schematic shows you exactly how everything is supposed to be connected.
Key Components in a Garage Door Sensor Wiring Schematic
A typical residential setup in the United States includes four main parts:
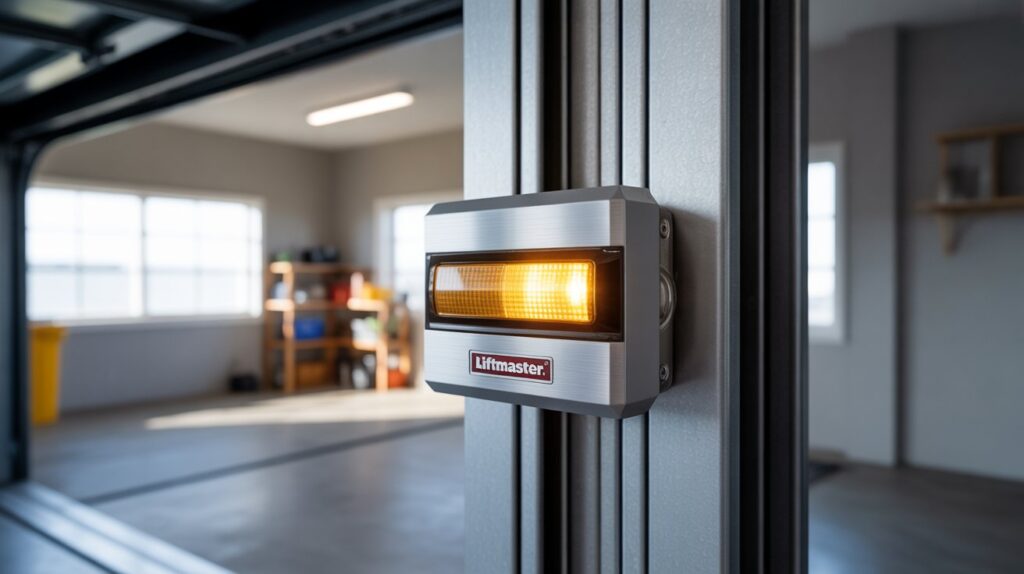
- Sending sensor (infrared transmitter) – This sensor sends an invisible infrared beam across the bottom of your garage door opening.
- Receiving sensor – This unit sits directly opposite the transmitter and detects the beam. If the beam is blocked, the door won’t close.
- Low-voltage wires – These thin wires carry the signal from both sensors back to the opener. They are usually white or white with a stripe.
- Garage door opener logic board – This is the “brain” inside the opener that reads the sensor signal and decides whether the door can safely close.
Both sensors must also be mounted at the correct height for the beam to work as intended — industry guidelines call for sensors to sit no higher than six inches above the floor on each side of the door, since mounting them too high can let a pet or small child go undetected beneath the beam.
When you look at a garage door sensor wiring schematic, you’ll see how both sensors connect to specific terminals on the opener. Most systems use a simple two-wire setup per sensor, making the layout easier than many homeowners expect.
Differences Between Major U.S. Brands
While the basic concept is the same, wiring diagrams can vary slightly between popular American brands like Chamberlain, LiftMaster, and Genie.
Some brands use color-coded terminals. Others group sensor wires into specific labeled ports. The placement may look different, but the function remains the same: transmitter and receiver must both connect correctly to the logic board.
This is why checking the correct schematic for your exact model matters. Using the wrong diagram can lead to confusion and wiring mistakes.
Why Polarity and Terminal Placement Matter
Even though these are low-voltage connections, correct polarity is critical. If the white wire and striped wire are reversed, the sensors may blink, stay off, or prevent the door from closing. The opener reads wiring errors as safety risks.
Proper terminal placement ensures:
- A stable infrared beam connection
- No false obstruction signals
- Smooth, reliable garage door operation
- Compliance with U.S. safety standards
The good news? Once you understand how the garage door sensor wiring schematic works, the system feels much less intimidating. It’s not complicated electronics — it’s simply organized connections that need to match the diagram.
Step-by-Step Breakdown of Garage Door Sensor Wiring Connections
Understanding the garage door sensor wiring schematic becomes much easier when you break it down step by step. Most residential homes in the United States use a simple, low-voltage two-wire system. There’s nothing overly technical about it — it’s just about making the right connections in the right place.
Standard Two-Wire Setup (Most U.S. Homes)
In a typical setup, each safety sensor has two wires running back to the garage door opener. These wires are usually:
- Solid white wire
- White wire with a black stripe (sometimes red or another stripe color depending on brand)
Both the sending sensor (transmitter) and the receiving sensor connect to specific terminals on the opener’s logic board. Most openers have clearly labeled ports for sensor wires.
Here’s how it generally works:
- The white wires from both sensors connect to the white terminal.
- The striped wires connect to the gray or colored terminal.
- The opener reads the signal from both sensors before allowing the door to close.
In most American garages, the wiring runs along the wall, across the ceiling, and into the opener housing. The layout is clean and direct — sensors mounted near the floor on each side, wires neatly stapled along framing, and both lines meeting at the motor unit.
When connected properly, the indicator lights on both sensors remain solid, confirming alignment and correct wiring.
Common Wiring Mistakes That Cause Problems
Even small wiring errors can prevent your garage door from closing. This is where frustration usually begins.
The most common issues include:
- Reversed wires – Swapping the white and striped wires at the terminal can cause blinking lights or a non-responsive system.
- Loose terminals – A slightly loose screw can interrupt the low-voltage signal.
- Damaged low-voltage cable – Staples driven too tight or wires pinched behind drywall can break the connection.
- Incorrect splicing – Twisted wires without proper connectors often lead to unstable signals.
These problems are more common than most homeowners realize. The good news is that a garage door sensor wiring schematic removes the guesswork. It shows exactly:
- Which wire goes to which terminal
- The correct polarity layout
- How both sensors should tie into the opener
- The proper wiring path for a safe connection
Instead of randomly adjusting wires or replacing parts, you can follow the schematic like a blueprint. It gives you confidence, saves money on unnecessary repairs, and ensures your garage door safety system works exactly as designed.
When wiring is correct, the system is simple, stable, and reliable — just the way it should be in any American home.
How to Read a Garage Door Sensor Wiring Schematic Like a Pro
A garage door sensor wiring schematic may look technical at first glance, but once you understand the basics, it becomes surprisingly simple. You don’t need to be an electrician. You just need to know what you’re looking at and follow the layout step by step.
The key is to approach the wiring diagram calmly and logically — the same way a technician would.
Understanding Symbols in Wiring Diagrams
Most wiring schematics use small symbols to represent components. In garage door systems, you’ll typically see:
- Small box icons for the sending and receiving sensors
- Lines representing low-voltage wires
- Terminal labels showing where wires connect on the opener
- A larger box symbol for the garage door opener logic board
These symbols are standardized across most U.S. residential systems. Once you recognize them, the diagram reads more like a map than a technical drawing.
Identifying Sensor Terminals
Every opener has designated terminals for safety sensors. These are usually labeled clearly inside the motor housing.
When reviewing a garage door sensor wiring schematic, focus on:
- The white terminal (common wire connection)
- The colored or striped terminal (signal wire connection)
- Clear markings for “sensor” or “photo eye” ports
Matching the wire color to the correct terminal is critical. Even a simple reversal can cause blinking lights or a door that won’t close.
Following Wire Paths Correctly
A common mistake homeowners make is tracing wires physically without comparing them to the schematic. Instead, follow the diagram first:
- Start at the sending sensor
- Trace the line back to the opener terminal
- Repeat for the receiving sensor
- Confirm both wires meet the correct ports
This prevents guesswork and avoids unnecessary rewiring. In real-world troubleshooting, most sensor issues are found by carefully tracing wire paths against the schematic.
Using Manufacturer Manuals Safely
Always use the wiring diagram specific to your opener model. Brands like Chamberlain, LiftMaster, and Genie provide model-specific manuals that include accurate wiring layouts.
Using the correct manual ensures:
- Proper terminal identification
- Correct polarity alignment
- Compatibility with your safety sensor system
Avoid relying on generic diagrams that may not match your unit.
Safety Best Practices Before You Begin
Before inspecting or adjusting any wiring:
- Disconnect power to the garage door opener first
- Avoid touching exposed wires while the unit is powered
- Use proper wire connectors if splicing is required
- Secure low-voltage wires neatly along walls to prevent damage
Even though sensor wiring is low voltage, safety should always come first.
From years of real-world troubleshooting experience, most garage door sensor problems are not complex failures — they’re simple wiring errors. When you understand how to read a garage door sensor wiring schematic, you gain confidence. You stop guessing. And you fix the issue the right way, safely and efficiently.
When to Repair, Rewire, or Call a Professional
Understanding a garage door sensor wiring schematic builds confidence — but it also helps you know your limits. Some wiring issues are safe to fix yourself. Others need professional attention. The key is recognizing which is which.
Signs the Wiring Needs Replacement
Low-voltage wiring wears out over time, especially in busy households where the garage door opens and closes daily. Consider replacing the wiring if you notice:
- Frayed or exposed sensor wires
- Corrosion at the terminals
- Intermittent blinking sensor lights
- The garage door reversing randomly
- Visible staple damage along the wire path
If the wiring looks brittle or pinched, or keeps failing after you tighten the connections, replacement is usually the safer long-term fix.
When Troubleshooting Is Safe to DIY
Most sensor issues are minor and safe for homeowners to handle. DIY troubleshooting is generally fine when:
- The issue involves loose terminal screws
- Wires appear reversed at the opener
- Sensor alignment needs adjustment
- You’re simply matching connections to the wiring schematic
Always disconnect power before touching any wiring. Since safety sensors run on low voltage, basic inspection and reconnection are typically safe when done carefully — as long as you’re not cutting or rerouting cables.
Situations That Require a Certified Technician
Some problems call for a certified garage door technician instead. Contact a professional if:
- The logic board appears damaged
- Wiring inside the opener housing is burnt or melted
- The system keeps failing after correct rewiring
- You suspect electrical shorts behind the walls
- The opener is still under manufacturer warranty
Technicians carry voltage and continuity testing tools that most homeowners don’t keep on hand.
Why Proper Wiring Protects Your Family and Property
Garage door safety sensors aren’t just a convenience feature — U.S. federal safety regulations (CPSC 16 CFR Part 1211) require residential garage door openers to include photoelectric sensors that reverse the door on detecting an obstruction.
Correct wiring ensures:
- The infrared safety beam functions properly
- The door stops if a child, pet, or object is detected
- Your vehicle and belongings stay protected
- Your opener stays within safety compliance standards
A properly wired garage door sensor wiring schematic isn’t just about fixing a blinking light — it’s about making sure the door closes safely every time. When in doubt, choose safety over speed.
Final Thoughts
A garage door sensor wiring schematic plays a direct role in your home’s safety and daily reliability. Once you understand how the sensors connect, you stop guessing — you start making informed decisions that protect your family and property.
Most garage door problems don’t start with mechanical failure. They start small — a loose terminal, reversed wires, or a damaged connection. Learning to read the wiring layout puts you in control before a small issue becomes a bigger repair.
If your sensors are still acting up after checking the wiring, the issue may be alignment rather than the connection itself — worth ruling out before replacing any parts.
FAQs
What gauge wire is used for garage door sensors?
Most sensors use 18–22 gauge low-voltage wire, commonly sold as bell wire or two-conductor cable.
Can I extend garage door sensor wires if they’re too short?
Yes, using proper wire connectors or splices — twisting bare wires together without a connector can cause signal issues.
Do garage door sensors need to be on a dedicated circuit?
No, sensors run on the opener’s built-in low-voltage power supply, not household electrical circuits.
Why does my garage door close but the sensor light is off?
This usually means a wiring or alignment fault, though some openers can still cycle briefly with a faulty sensor before failing a safety check.
Can bad sensor wiring damage the opener’s logic board?
Rarely — a short or reversed connection typically triggers a safety lockout rather than damaging the board itself.